Sunday 13 February 2022

Spring Faux Shadow Box Decor

  Happy SUPERBOWL Sunday crafty friends!

Melinda here with you today. I am not a big football fan, but my hubby, son and brothers all love to watch.... so they will be tuning in this evening.... How about you? If I am lucky, I will be able to get lost here in my craft room...lol!  Today I am sharing a cute little Easter décor piece I created with dies from the new Cottage Cutz SPRING RELEASE! Here's my project.

I created this little faux shadow box with a cute little décor piece inside. 

I started by taking the adorable little pieces from the Spring Chickee in Basket die and coloring them. I cut them all from plain white cardstock.

I cut out two of the Nested Stitched Doilies from the die Set in white cardstock. I wanted to make some mats for them and a two hour circle cutting saga began!!!!...lol! I have some punches and recently got this circle cutter. I know some things are great tools and some are not. This, for me, is a big fat NOT! It was something I just couldn't use with ease. I didn't have the right size punches either. I didn't want to pull out my electronic cutter for a simple circle....so the lesson here...
get a great set of basic circle dies.... like this set!

Going forward, I will be collecting all of the basics from Cottage Cutz... I don't want to go around the "circle saga mountain" again...lol!

Next, in staying with the circle theme, I wanted to create a rosette. So I cut out a piece of paper 5" x 12" from some patterned paper in my stash. I scored it every half inch.

I then cut it in half, so I had two pieces that measured 2.5 x 12. They were both scored. I then "accordion" folded them. 

For one I started with the first flap up. For the other I started with the first flap down. This way when it came time to join them together, they would just fall right in line.

Here's a photo of the adhesive on one end tab. I just adhered the first flap of the other one, right onto that piece.
Here's what it looks like joined together. You can't tell where one begins and the other ends.

I then adhered both ends together. That creates this piece.


Once you gather the folds together, you lay it flat and you get your rosette. Here you can see that you can change the size of the rosette based on how loose you gather it, or how tight and small you make the center.

Here is a picture of the center closed in together much tighter.

I then used some hot glue and a circle punched piece of cardstock to the back.

I do the same thing in the front. I use hot glue so that all the folds will stay together.
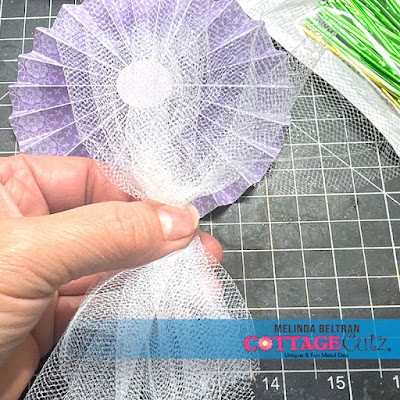

I wanted to add a little extra something, so I had this white tulle netting with a little sparkle.
I just cut a length of it off the spool. Approximately 20 inches or so and just gathered it in the center.

I folded it and more or less found the center. I used a little twist tie from my stash to keep it gathered in the center.

I then poofed it out and saw that it was way too big for the rosette so....


I gathered it together and chopped of about 3/4-1"


I then arranged the cute little pieces onto the circle doily mats.

I then added all that onto the tulle and rosette.

Here's another view. you can see I added some foam in between the layers to give it all some extra dimension.

Next, I decided to create what I am calling a "faux shadow box" I needed the inside to be a finished size of 6x6. So I worked out from there. Here is a photo as I was putting it together. There is some definite "tweaking" I had to do, but as soon as I can, I will share the dimensions. I kind of had to "Frankenstein" this one.
Once I got it all together, I added the sentiments Easter and Blessings along the top. Here is a closer look at the blessings.


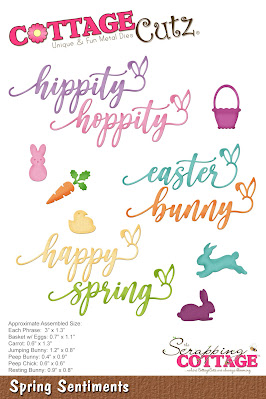
Here is a closer look at the Easter. They both come from the Spring Sentiments Die

Here's another look at my finished project.

I have it sitting on my entrance table. I will finish decorating it for the coming season and this will definitely be a part of it. 


The Dies I used to create this project:


In case you didn't hear, The CottageCutz YouTube channel is up and running.  Head over and check out the latest video! There is a giveaway for subscribing too!

Well that about covers it for today! If you want to see more of my work, head over to my blog: CraftyMelinda.com. Until the next time, have a wonderfully crafty day!
Melinda Beltran

Sunday 30 January 2022

Bunny Peeker Treat Box With Bonus Card

 Happy Sunday crafty friends!

I am sharing a little more spring inspiration today featuring dies from the new Cottage Cutz SPRING RELEASE! Today's project is a super cute little box with the adorable new Peeker Bunny w/ Pocket Die for the front!

Sunday 23 January 2022

Spring Kitty Die Cut Card

 Happy Sunday crafty friends!

Melinda here with you today. I am super happy to be sharing a little spring inspiration featuring dies from the new SPRING RELEASE! Today's project is a fun and cheerful card. Take Look!
The finished card is a top folding US-A4 card base. I used some regular white cardstock. 
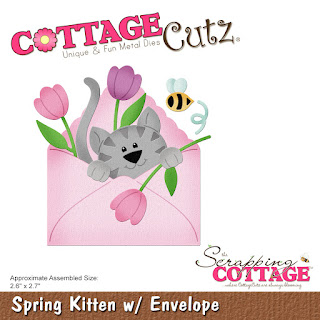
The main focus of my card is the adorable new Spring Kitten w/Envelope Die. It is part of the fantastic new Spring Release! I started by cutting out my die pieces in white cardstock. I then colored my various pieces in with my markers. I did also cut out the pieces in a light yellow cardstock as well as a patterned paper from Doodlebug. 

Here's a quick look at the envelope pieces in the yellow and patterned paper.

I decided to make a "liner" for the inside flap of my envelope with the patterned paper. I simply cut off the flap and then slid it under the yellow envelope piece. I then started building the scene by adding that adorable little kitty.

I assembled the kitty holding the flowers and added that onto the scallop stitched rectangle with a patterned paper mat. I then used the largest scallop stitched rectangle in the same die set and added a floral patterned paper mat to that. I layered them onto the background mat. To finish off my card I added the Happy and Spring Sentiment from the Spring Sentiments die.


Here is one last look at my finished card.  I think it turned out adorable. Full of springtime happiness! I am looking forward to spreading some cheer to a friend who could really use some!


The Dies I used to create this project:


I used the Stitched version but those are not available. These are a great alternative.

In case you didn't hear, The CottageCutz YouTube channel is up and running.  Head over and check out the latest video! There is a giveaway for subscribing too!


Well that about covers it for today! Until the next time, have a wonderfully crafty day!
Melinda Beltran

Thursday 30 December 2021

Ice Skates Die Cut Mini Shadow Box

  Happy Sunday crafty friends! 

Today is my day to share over on the scrapping cottage blog. SOOOOO, I created this fun winter themed mini shadow box using the Holiday Ice Skate Floral die set and the pierced circle die set.

Friday 24 May 2013

Beautiful creations by Ann McLachlan


Look at how beautifully ornate these creations are from Ann McLachlan at Creative Options Blog
I honestly think they are a feast for the eyes and I have lost quite a bit of time browsing her lovely blog as there are so many gorgeous designs to see


I'd like to say a big Thank you to everyone who has posted on my 'Would you like to be featured on Inspirational' post and for everyone that has emailed, I am getting through all the replies slowly but surely, I will also be asking for new people to join the Inspirational Team so look out for that in the next couple of weeks.  In the meantime though please go and check out Ann's lovely Blog HERE

Saturday 11 May 2013

Would you like to be featured on Inspirational?

If you are happy for a creation of yours to be featured on Inspirational please comment on this thread ~ Just say 'yes' or 'feature me' if you like ;)

Or you can email inspirational.blogs@gmail.com

There is no guarantee that you will be featured but this way the Inspirational Team can look through the blogs listed here knowing we have permission to feature you.

If you are featured we will contact you with a link to your feature by either emailing or posting a comment on your blog :)

Tuesday 23 April 2013

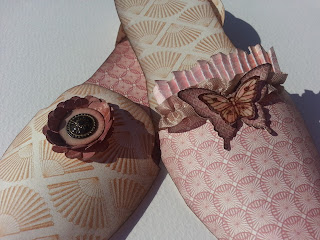
Check out these gorgeous paper-crafted shoes by Ruth Trice


 Hi everyone,

I came across these stunning paper-crafted shoes on Ruth's Artful Stampin Blog today and fell in love.. aren't they beautiful....

Click HERE to visit Ruth's Blog which is jam packed with inspiring creations, she is so talented


Credit is also given to Terri at Artful Affirmations for the shoe template which you can find HERE

Back with more inspiring creations soon

Julie :)